How to Install TV Mount: Easy Step-by-Step Guide
Gather Your Tools and Your New TV Mount
Install Your New TV Wall Mount in 4 Easy Steps. Alright, let's get this done right. Before you even think about drilling a hole in your wall, the real work begins with gathering your gear and picking the perfect mount. Getting this part right is the difference between a clean, professional-looking setup and a wobbly TV that gives you anxiety every time you walk by.
Think of it as your project's foundation. A little prep work now saves a ton of headaches later.
Starting a TV mounting project without having everything ready is a recipe for frustration. You'll be running back and forth to the garage, misplacing things, and turning a simple job into an all-day affair. Let's avoid that.
The first, and most important, phase is all about making smart choices with your mount and having every tool you need right there with you. This initial legwork is what guarantees a smooth, secure, and successful installation.
4 steps of TV Mount Installation
-

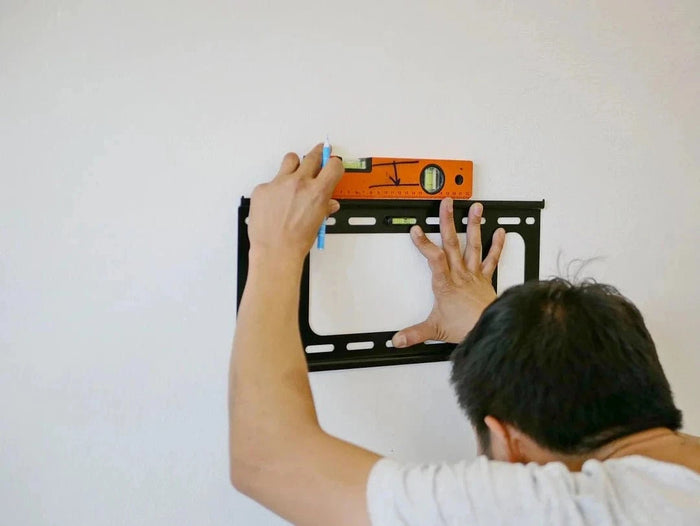
Step 1
Find the studs where the mount will be installed, and mark the holes. Drill pilot holes. Insert the wall hardware to secure the wall plate to the wall.
-

Step 2
Locate the VESA holes behind your TV and pick the correct spacer and screws to connect the vertical TV brackets to the back of your TV.
-

Step 3
Hang the TV on the wall mount, and secure the TV brackets.
-

Step 4
Adjust the tilt and swivel angle of the TV, and enjoy!


prerequisite
Pick the Perfect Mount
The type of mount you choose completely changes how you'll interact with your TV. There are three main styles, each designed for a different need. If you want to get really granular, you can find a ton more detail in an article "How do I choose a TV Wall Mount".
For now, let's quickly break down your options from TV Mounts Collection.


TV Mount Type Quick Comparison
Here's a quick comparison of the most common TV mount types to help you choose the right one for your space and viewing needs.
| Mount Type | Key Feature | Best For | Flexibility |
|---|---|---|---|
| Fixed | Sits flush against the wall | Low-profile, sleek look in dedicated viewing areas | None |
| Tilting | Angles the screen up or down | Mounting above eye-level (e.g., over a fireplace) | Vertical Tilt |
| Full-Motion | Extends, swivels, and tilts | Corners, large rooms, and multiple viewing spots | Maximum |
Getting the right mount is about more than just matching the screen size. It’s about how you use your space and where you want to watch from.
A common mistake I see is people buying a mount based only on the TV's screen size. You must check the mount's weight capacity and VESA pattern compatibility. Make sure it's a perfect match for your specific TV model, or you're asking for trouble.
Your Essential Tool Checklist
Having your tools laid out and ready to go will keep you in the zone. This is your pre-flight checklist for a successful project.
Here’s what you absolutely can't do the job without:
- Power Drill: For drilling the pilot holes for the big lag bolts.
- Stud Finder: This is non-negotiable. You have to anchor into the wooden studs behind your drywall.
- Level: To make sure your TV isn't crooked. A 24-inch level is a great all-around size for this.
- Tape Measure: Absolutely essential for finding the right height and centering the mount on the wall.
- Socket Wrench: You'll need this to properly tighten the lag bolts into the studs. Don't try to get by with just a drill.
- Painter's Tape: This is my favorite pro-tip. Use it to mark your stud locations and outline where the TV will sit without leaving a single mark on your wall.
It's no surprise that wall mounting has become the go-to method for installing TVs, especially as screens keep getting bigger. It's a fantastic way to save floor space and create a modern look. Once you get the hang of this, you might even find yourself ready to tackle other projects, like setting up a DIY security camera system setup.
Finding Wall Studs: The Secret to a Secure Mount
Let's be blunt: the entire safety of your beautiful new TV rests on finding and using the studs inside your wall. Drywall is just compressed gypsum powder between paper—it's not designed to hold a 50-pound television. Attempting to mount a TV on drywall alone is a recipe for disaster.
Think of the studs as your wall's skeleton. By drilling your mount directly into this solid wood frame, you're creating an anchor point that can easily support the weight of your TV and the mount itself, keeping it safe and secure for years to come. This isn't just a suggestion; it's the most critical step for a rock-solid installation.
The Modern Approach: Using a Stud Finder
Hands down, the easiest and most accurate way to find studs is with an electronic stud finder. These clever gadgets work by detecting changes in density behind your wall, giving you a clear signal—usually a light or a beep—when you've found something solid. For a tool that helps with both locating studs and getting things perfectly level, a 3-in-1 stud detector with laser level is a fantastic investment for any DIYer.
Getting an accurate reading is simple if you follow a few key steps:
- Start with Calibration: Before you start sliding it around, place the stud finder flat against the wall, a foot or so away from where you plan to mount the TV. Press the button and wait for it to beep or flash, letting you know it's calibrated to the wall's base density.
- Move Slow and Steady: Don’t rush it. Slide the device horizontally across the wall in a smooth, slow motion. This gives the sensor time to register the density change accurately.
- Mark Both Edges, Find the Center: When the finder lights up, don't just make a single mark. Instead, mark the spot where the signal starts and the spot where it stops. The true center of the stud lies right between those two marks. That's your bullseye for drilling.
No Stud Finder? No Problem.
If you don't have a stud finder on hand, don't worry. People have been hanging heavy things on walls for a long time, and a few old-school tricks still work surprisingly well.
The classic "tap test" is a good place to start. Just knock on the wall with your knuckles. You'll quickly notice a difference between the hollow, resonant sound of empty space and the dull, solid thud you hear when you're knocking over a stud. It takes a bit of an ear, but it's more reliable than you might think.
Pro Tip: Got a strong magnet? You've got a stud finder. Drywall is attached to studs with metal screws. Slowly drag a powerful magnet across the wall, and you'll feel a distinct pull when it finds a screw head. Once you find one, you know you've found the vertical line of a stud.
After you've located your studs, grab a level and some painter's tape. Mark a perfectly horizontal line across the studs where you plan to install the mount. This gives you a clear visual guide to ensure your holes are perfectly aligned.
The height of that line matters, too. For a detailed breakdown of the best viewing height, our guide on how high you should mount your TV is a must-read.
What if the perfect spot for your TV is right between two studs? In that case, you might need a mount with an extra-wide wall plate to span the distance. While heavy-duty toggle anchors for drywall exist, nothing beats the security of anchoring directly into a stud. It's always the safest bet.
Drilling Pilot Holes and Securing the Wall Bracket
You’ve found and marked your studs, and now we’re at the point of no return. This is the moment where all that careful prep work really comes into play, ensuring your wall bracket will be rock-solid. Honestly, getting this drilling part right is the absolute key to a safe and secure TV mount installation.
First things first, you need to pick the right drill bit. The mount kit includes some beefy lag bolts, and your pilot hole must be just a little bit smaller than the bolt's diameter. I've seen people make the mistake of using a bit that's too big, which means the bolt will just spin and never tighten. Go too small, and you risk splitting the wooden stud when you drive the bolt in. Your manual should tell you the exact size to use, but if it doesn't, here’s a pro tip: hold the drill bit in front of the lag bolt. The bit should completely cover the solid core of the bolt, but you should still see the threads peeking out on either side.
Drilling and Driving with Precision
Got the right bit? Great. Now, let's make some holes.
Hold the wall plate up to your guideline on the wall and double-check that it’s perfectly level. Once you’re happy with the position, use a pencil to mark your drilling spots right through the mounting holes on the plate.
Now you can set the plate aside. Drill your pilot holes directly into the center of the studs you marked. The trick here is to keep your drill perfectly straight—no angles. Apply steady, firm pressure, and drill deep enough to accommodate the entire threaded part of the lag bolt. A clean, straight hole is what you're aiming for.
This next image lays out the simple but critical steps for this part of the job.
As you can see, it really just comes down to leveling the mount, marking your spots, and drilling with care.
With the pilot holes ready, place the wall plate back over them and start threading in the lag bolts by hand. Then, you can use your drill to drive them in—but stop before they're fully tight.
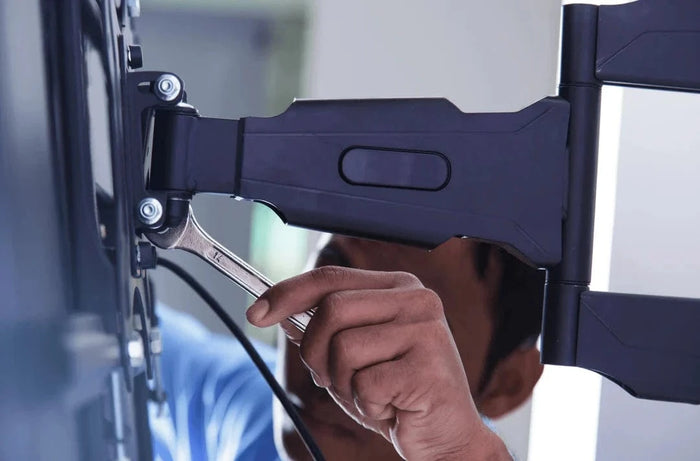
Crucial Tip: Never use your power drill to fully tighten the lag bolts. The torque is just too much. You can easily strip the wood inside the stud, or worse, snap the head right off the bolt. Trust me, I've seen it happen. Always switch to a socket wrench for those final, critical turns.
Use the socket wrench to tighten the bolts until the wall plate is completely snug against the wall. Give it a good wiggle. It shouldn't move. At all. This solid foundation is what gives you peace of mind when you hang your expensive TV on it.
It's also a good idea to know the limits of your gear. You can learn more about how to evaluate the TV wall mount weight limit to be absolutely certain your entire setup is safe and sound.
Attaching the Brackets and Hanging Your TV
Alright, your wall plate is rock-solid and anchored to the studs. Now, let's get the TV ready for its new home. This is the last step before the big lift, and paying close attention here will make sure everything lines up perfectly.
First thing's first: protect that screen. Lay your TV face-down on something soft and flat. A thick blanket on the floor is perfect, or you can use the foam padding that came in the box. The last thing you want is a scratch before you even get it on the wall.

Matching Hardware to Your TV's VESA Pattern
Flip the TV over, and you'll find four screw holes in a square or rectangular formation. This is the VESA mounting pattern, a handy universal standard that lets you know your mount and TV will play nice together. The vertical bracket arms from your kit are designed to line up with these exact holes.
Now for the hardware. Your mount kit probably included a plastic tray with a dozen different types of screws and spacers. It can look a little intimidating, but finding the right ones is easier than you think.
- Find the Right Diameter: Take a few different-sized screws and gently try to thread them into the VESA holes by hand. The right one will catch and turn smoothly. If it’s wobbly, it's too small. If it won't start at all, it's too big. Don't force it.
- Check the Screw Length: This part is critical. The screw needs to be long enough to get a secure grip, but not so long that it punches through and damages the TV's guts. This is a surprisingly common and very expensive mistake.
A good rule of thumb I always follow is to make sure the screw can make at least five full turns. If your TV has a curved back or the mounting holes are recessed, those plastic spacers in your kit are your best friend. They'll give the brackets a flat surface to rest on and prevent the screws from going in too deep.
Attach the vertical arms to the back of the TV using the correct screws (and spacers, if needed). Tighten them so they're snug, but don't crank down on them with all your strength. Overtightening can damage the TV. For a more detailed walkthrough, you can always check out our complete guide on how to mount a TV on the wall.
It’s no surprise that wall-mounting has become so popular. The global TV mount market hit around USD 13.5 billion in 2023 and is only growing as more people swap out bulky old units for sleek, space-saving flat screens.
The Two-Person Lift: Hanging and Locking It Down
I can't stress this enough: this is a two-person job. Seriously. Don't be a hero and try to lift a 65-inch TV by yourself. It’s the fastest way to a broken screen or a pulled muscle.
Get your helper, with one person on each side of the TV. Lift with your legs, not your back, and carefully walk it over to the wall plate.
Angle the TV slightly and hook the top of the vertical brackets onto the top edge of the wall plate. Most mounts are designed to hang there securely for a moment, which frees up your hands to deal with the bottom.
Finally, secure the bottom locks. Depending on your mount, this could be a couple of screws you tighten or spring-loaded clips that snap into place with an audible "click." Once it’s locked, give the bottom of the TV a gentle tug and a light push to make sure it’s not going anywhere.
Adding the Final Touches and Managing Cables
Alright, your TV is hanging on the wall—congratulations! But before you grab the remote and sink into the couch, let's tackle the final details that elevate your project from "good enough" to truly professional. This is where we perfect the alignment and get that dreaded cable clutter under control.
With the full weight of the TV on the mount, grab your level one last time. It's common for things to shift slightly. If it's a hair off-kilter, don't worry. Most modern mounts include post-installation leveling screws for this very reason, allowing you to make small rotational tweaks without taking everything down. A tiny adjustment here makes a world of difference.

Taming the Wire Clutter
Now for what might be the most satisfying part of the whole job: dealing with that nest of wires dangling below your beautiful new screen. Nothing ruins the clean, floating look faster than a tangle of HDMI and power cords. You've got a few great ways to handle this, ranging from simple fixes to completely invisible solutions.
- Cable Clips & Sleeves: The quickest win. Adhesive cable clips can neatly guide wires along the back edge of your TV or down a furniture leg. A braided cable sleeve is another fantastic option; it bundles all your cords into a single, tidy tube.
- On-Wall Cable Raceways: These are a game-changer. They're essentially plastic channels that stick right to your wall. You just pop the cables inside, snap the cover on, and—best of all—you can paint them to match your wall. They blend in surprisingly well.
- In-Wall Cable Hiding Kits: If you want that ultimate, "how did they do that?" look, an in-wall kit is the gold standard. These kits give you everything you need to safely pass low-voltage cables like HDMI and optical audio right through the drywall.
For a deeper dive into these methods, check out our comprehensive guide on how to hide TV cords.
A good cable management strategy is about more than just being tidy. It's about making your technology feel like a seamless part of the room, not an afterthought. Hiding the wires is what truly achieves that floating TV effect.
The desire for these clean, space-saving setups isn't just a local trend; it's a global phenomenon. As a reflection of technology adoption and interior design trends, the TV mount market is growing worldwide. In 2023, Latin America accounted for over 5% of the global TV mount revenue, with the Middle East and Africa contributing another 3%. It just goes to show that a clean, well-mounted TV is a universal goal.
Single Stud Installation

Double Stud Installation

Installation Articles
-
How To Mount A TV On the Wall Without Studs
As TVs have gotten thinner in size but drastically better in image quality, wall mounting has become increasingly popular.Mounting a TVon the wall can help to save space by doing away with large, clunky entertainment consoles, while providing a cleaner, neater, more organized look with nowires, cables or cordsin sight.
-
Mounting a TV In a Corner Wall
Have you recently moved or gotten the urge to rearrange your home? Maybe you thought that mounting your TV in a corner would be the perfect way to make use of your new space. However, choosing this location may raise a number of questions. How will you attach it to the wall?
-
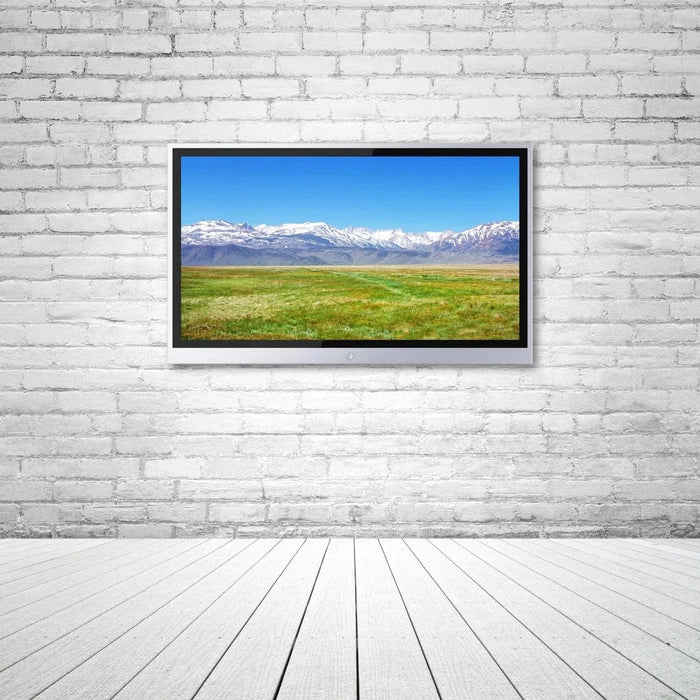
How to Mount a TV On Brick
Have you recently purchased the MI-384 Fireplace TV Mount? If so, you probably want to know how to mount a TV on brick. Fortunately, it’s fast and easy. You don’t need an expert, just an extra helping hand.
-
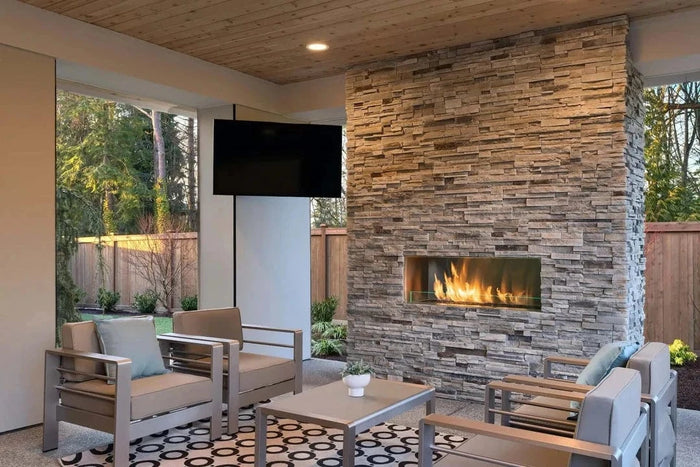
How to Mount a TV Outside
While most people keep their TVs indoors, those with extra entertaining space in their backyard have the option of mounting a TV outside. Outdoor TV installation can seem straightforward, but it comes with its challenges. Read on to learnhow to mount a TV outside.
-
How To Hang a TV From The Ceiling
If you've recently purchased the motorized ceiling TV Wall Mount MI-4223, you’re likely wondering how to mount a TV from the ceiling on your own. The good news is that there’s no need to hire a specialist to mount it for you!
This specialty wall mount is fast and easy to install—all that’s required is some tools and twenty minutes of your time.


